
PreSwap
A free After Effects panel that pre-renders a heavy layer and swaps the render in, while you keep working.
Every comp has that one layer that makes everything crawl. A plate with three denoisers on it, a precomp full of particles, a clean-up that takes ten seconds a frame. You know it's done, you just don't want to wait for it every time you scrub. So you pre-render it, import it, line it up, hide the original, and hope you remember which file was which. PreSwap does all of that with one button.
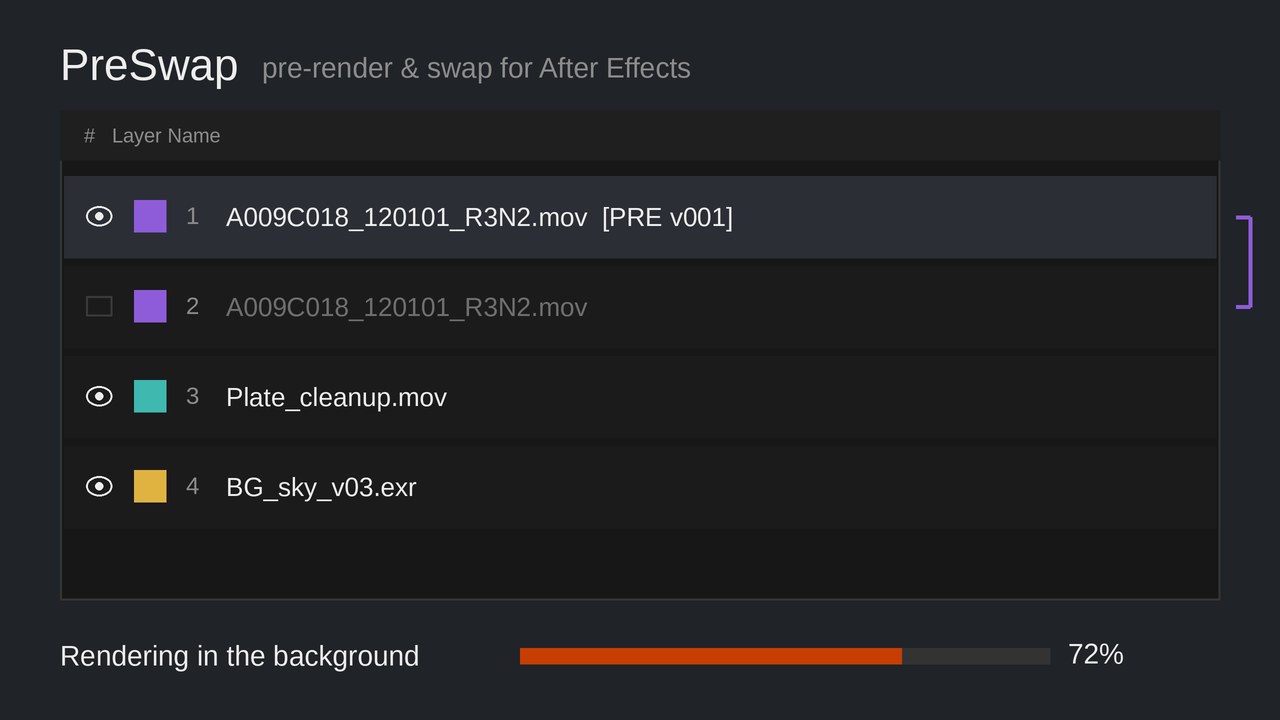
What it does
- Precomp layer: it renders the precomp and swaps the render into a copy of the layer. Your transforms, effects, masks and mattes on that layer stay live, the same as After Effects' own pre-render.
- Any other layer (footage with effects, shapes, text): it renders the layer the way it looks in your comp, with its effects, masks, matte, parenting and camera, and puts that render right above it.
- Whole comp: press Whole comp and it renders the comp you have open, switches off every layer that was visible and puts the render on top. Handy when a comp is finished but you keep scrubbing past it.
- The original stays where it was with its eye switched off, so going back is one click.
- Files and layers get matching names with a version number, like
Shot__Plate_PR4444A_v001.movandPlate [PRE v001]. Running it again makes v002. Nothing gets overwritten. - Renders go into a
PreSwapRendersfolder next to your project file, and into a PreSwapRenders bin in the project panel. - It only renders the part of the layer you actually use, so a long precomp that's on screen for two seconds renders two seconds.
Install (once)
- Put
PreSwap.jsxinC:\Program Files\Adobe\Adobe After Effects <version>\Support Files\Scripts\ScriptUI Panels\(on a Mac:Applications/Adobe After Effects <version>/Scripts/ScriptUI Panels/). - Restart After Effects and open it from the Window menu. Dock it wherever you like.
- Turn on Edit › Preferences › Scripting & Expressions › Allow Scripts to Write Files and Access Network. It needs that to make the render folder.
Use
- Save your project once, so PreSwap knows where to put the renders.
- Pick a format and tick Alpha if you need it.
- Select one or more layers and press Pre-render & Swap.
- Keep working. The bar shows how far it is, and when a render is done it's swapped in by itself. Cmd+Z or Ctrl+Z undoes a swap in one go.
Formats
ProRes 4444 as a .mov, or a PNG, TIFF, DPX or EXR sequence, with or without alpha. Sequences get their own subfolder. After Effects doesn't let a script set codecs directly, so each choice uses one of your own Output Module templates. Press List and the panel picks a matching one by name (anything with "4444" and "+A" or "alpha" in it for ProRes with alpha, for example). You can always pick another one, and it remembers your choice per format.
If there's no match yet, make the template once via Edit › Templates › Output Module, give it a name that says what it is, like "ProRes 4444 RGB" or "DPX", and press List again.
Rendering in the background
A script in After Effects can't render without freezing the app, which is why you normally get the hourglass. So PreSwap saves your project and hands the render to aerender, the command-line renderer that comes with After Effects. It runs in its own little window while you carry on. The bar in the panel follows its progress, and Cancel stops it.
Two things to know: it saves your project before it starts, and it runs a second copy of After Effects, so it uses its own memory. If you'd rather not, untick Render in background and it renders the normal way.
Good to know
- Cameras, lights, nulls and adjustment layers are skipped, since there's nothing to render on their own.
- A layer that's time-remapped or stretched renders its whole precomp, so the remap keeps working.
- The swapped-in layer is plain footage, so "collapse transformations" on a precomp doesn't carry over.
- Background rendering is Windows only for now. On a Mac, untick it and it renders in the foreground.
Questions
Why not just use After Effects proxies?
You can, and I tried. But it's so many steps and things to figure out. You set up the proxy, and then it turns out the Best Settings render template is set to Use No Proxies, so your final render goes back to the source and renders everything again anyway. Then you're digging through render settings. I just wanted a simple button in the panel that swaps my layers and precomps for a render, so I can build the comp and keep it fast. With PreSwap the render is a normal layer in your comp, so the final render uses it. And you can see it, version it and switch back to the original with one eye icon.
Can I keep working while it renders?
Yes. In background mode the project is saved and aerender, the command-line renderer that comes with After Effects, renders in its own process. The panel shows a progress bar and swaps the render in when it's done.
Which formats can it render?
ProRes 4444 as a .mov, or PNG, TIFF, DPX and EXR sequences, with or without alpha. Each choice uses one of your own Output Module templates, matched by name, and you can pick a different one in the panel.
Does it work on a Mac?
The foreground render does. Background rendering is Windows only for now.
Free to use and share.